For quite a long time I’ve been interested in long exposure photography but never really felt like I wanted to get away from quicker ways of photographing, such as street and portraits, where my general approach is more spontaneous in a way, as in, I see something I like, quickly frame it and snap a photo.
Not being able to ignore the calling anymore, I decided to get myself a new ND1000 filter and a light tripod, sturdy enough to carry 2kg worth of camera and lens in total.
Understanding exposure times and results
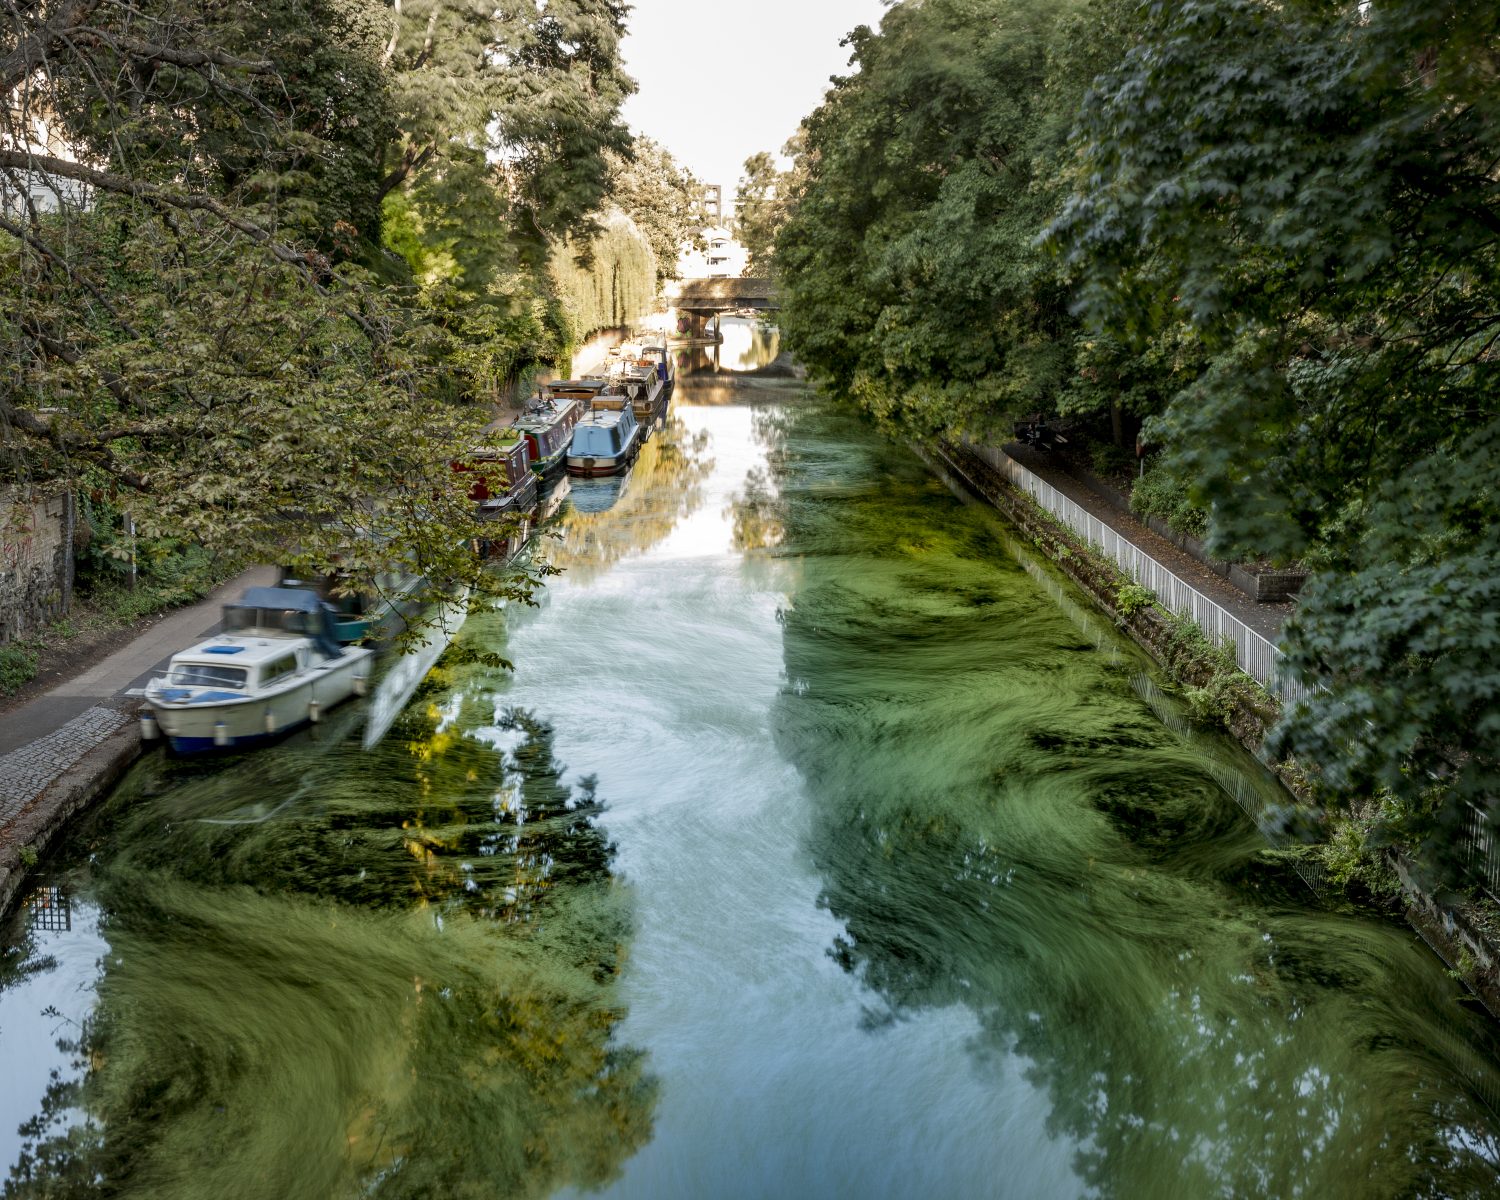
Since I’ve never done this before, I wanted to get acquainted with exposure times and expectations in terms of water and cloud flow, while making sure to avoid overexposing some areas with high contrasts situations; I’ve taken some test shots around Regents Canal area in Islington, London since the water flow was relatively slow, there’s quite a good amount of moss in the water during this time of the year (making for an intriguing view) and light contrasts are not so sharp towards late afternoon times.
The unexpected movements
Interestingly, while I was expecting the water to be flowing straight down the canal, I noticed that there were instead plenty of twirls in the flow from my first longish exposure (2 minutes), but I soon got impatient and decided to move on to other spots in the meantime before the light would change; When I got back to the same spot I tried again a similar composition but with a longer exposure (~5 minutes) to enhance the water movement even more.
One of the interesting things about long exposure is that all the subtle movement become much more evident, sometimes landscapes we’re used to see as ordinary can get a rather surreal touch.
Improvements
Unfortunately, I didn’t have a graduated ND filter with me so I ended up burning some parts of the image that were getting direct sunlight at that time… so, I got the water flow right but couldn’t recover the burnt areas, lesson learnt, will need a graduated filter moving for these situations moving forward;
Image comparison below, 2 minutes exposure on the left, 5 minutes on the right:

Next steps
I may be able to merge the two images together and save the burnt area by replacing it with a section from the other photo, but I don’t like fiddling too much in post production – especially when it comes to compensate for a poor exposure. If conditions are still favourable I should still be able to test a few more shots in the same location, adding a graduated ND and maybe trying stacked photo techniques and compare results of one single long exposure against more shorter bursts merged together.
Long exposure equipment:
For the purpose of these tests, find below links to the equipment I purchased on Amazon:
The links below are affiliate links, meaning, at no additional cost to you, I will earn a commission if you click through and make a purchase.
DolDer X-pro Series 77mm Slim Neutral Density 1000 ND1000 Filter

K&F Concept Compact Camera Tripod 62″ Aluminium 10kg Load Capacity
